Select the relevant version for your installation.
v1.1.38.8 (Mar 1, 2024) and later
Installation Guide
Version 1.1.20.5 (Apr 28, 2023)
This document guides you through the process of installing DataLark.
Overview
The installation process involves 8 steps. During those 8 steps, the components listed below will be installed:
- DataLark Core Application
- ArangoDB v.3
- Microsoft Visual C++ 2010 SP1 Redistributable x64
- Microsoft Visual C++ 2022 Redistributable x64
- .NET Libraries
- .NET Core Hosting Bundle 7.0.5 win x64
- .NET Desktop Runtime 7.0.5 win x64
- .NET Framework 4.8 win x64
Requirements
Before you begin, make sure your device meets the DataLark system requirements:
Note that larger projects require more system resources, for example, a data set with 10k records increases the size of the local database by about 1GB per run.
For the installation on VMs follow the requirements below.
Operating System Requirements
DataLark can be installed only on a Windows-based operating system. The recommended version is Windows Server 2019 or 2022.
All supported versions:
- Windows 11 version 21H2 or higher: Home, Pro, Pro
Education, Pro for Workstations,
Enterprise, and Education
- Windows 10 version 1909 or higher: Home, Professional, Education, and Enterprise
- Windows Server 2022: Standard and Datacenter
- Windows Server 2019: Standard and Datacenter
- Windows Server 2016: Standard and Datacenter
Minimum Hardware Requirements
DataLark DEV Instance:
- 4 vCPU
- 64GB RAM
- 2GB SSD Drive for DataLark core components and DataLark Database
DataLark QA and PROD Instance:
- 4 vCPU
- 64GB RAM
- 4GB SSD Drive for DataLark core components and DataLark Database
DataLark Download
- Download DataLark.
- Wait until the download is complete and run the installer.
Note that administrator rights are required to install DataLark.
DataLark Installation
1. After launching the installer, you will be prompted to accept the License Agreement.
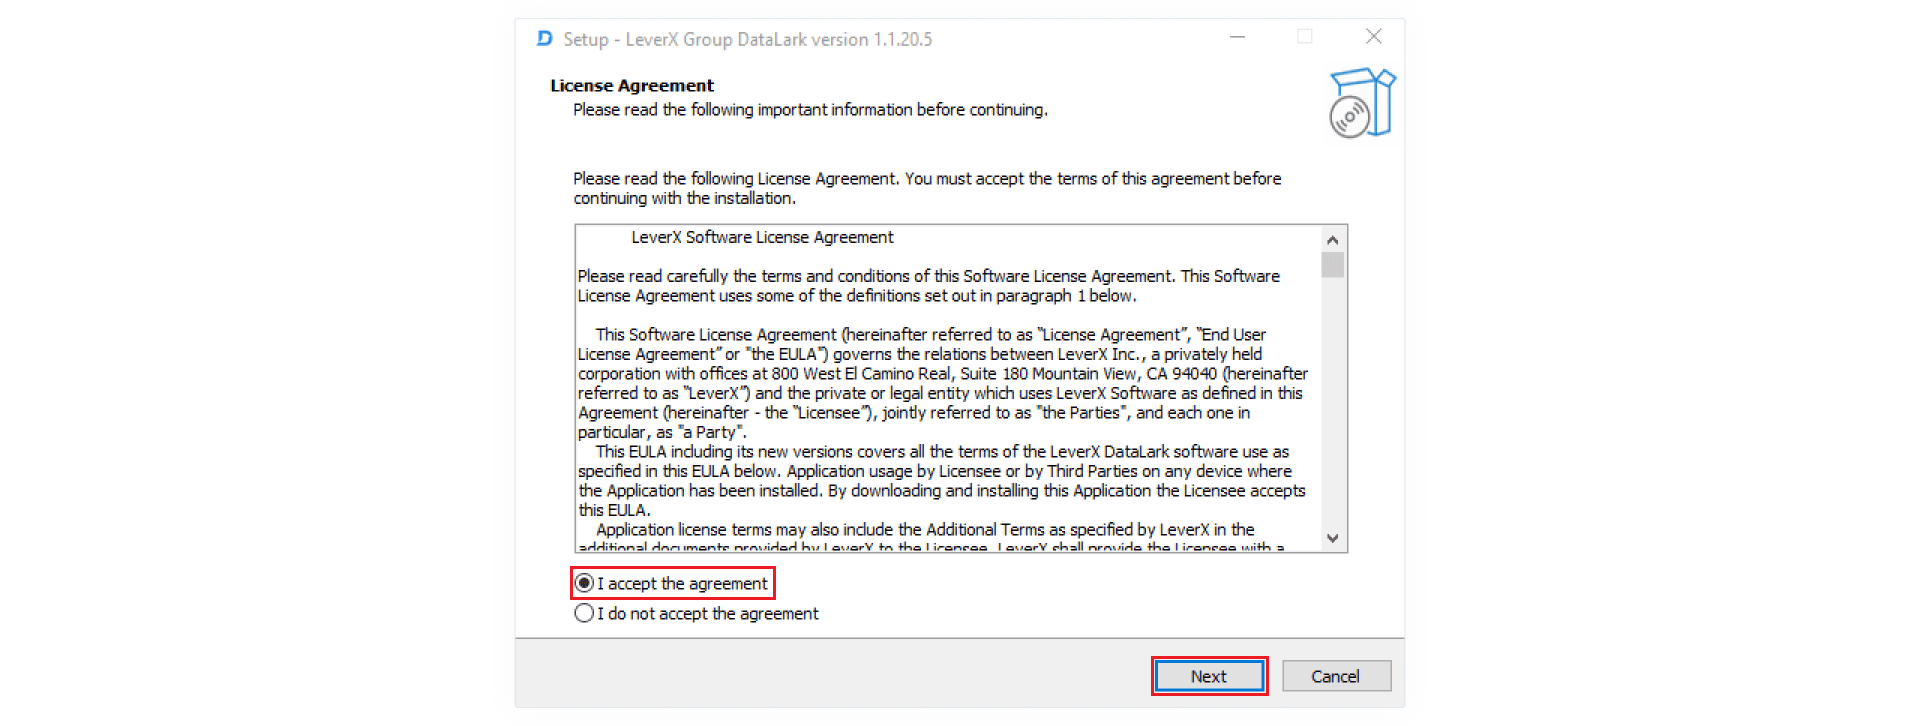 Figure 1: License
Agreement
Figure 1: License
Agreement
2. Select Next to install the application in the default location or select Browse… to choose a different location.
 Figure 2:
Destination Location
Figure 2:
Destination Location
Consider the disk space required by the application.
3. Select Next.
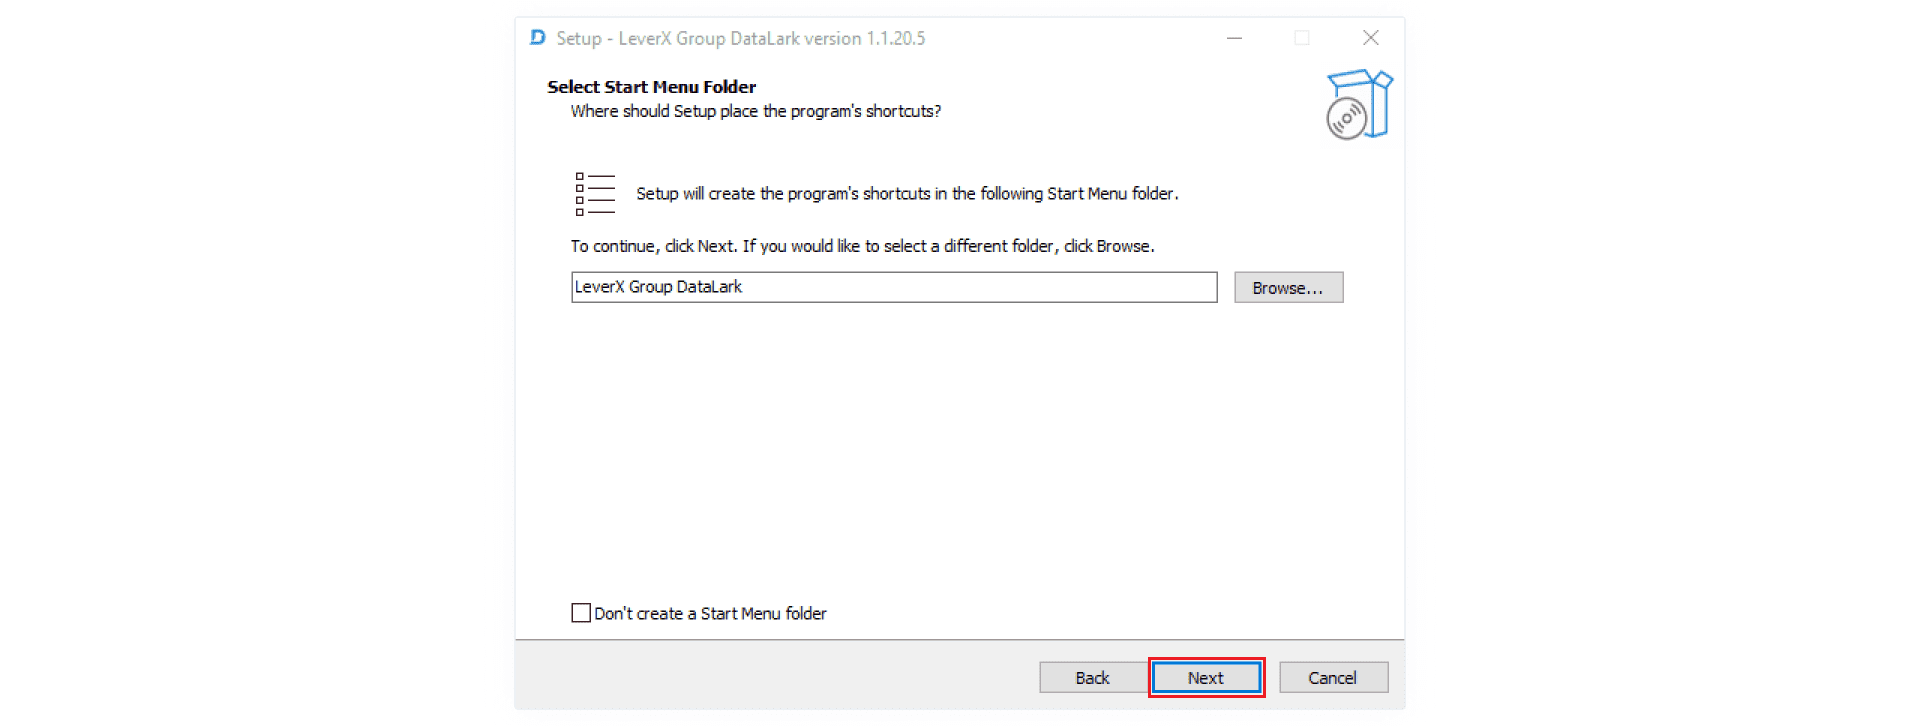 Figure 3: Start
Menu Folder
Figure 3: Start
Menu Folder
4. Mark the Create a desktop shortcut checkbox and select Next.
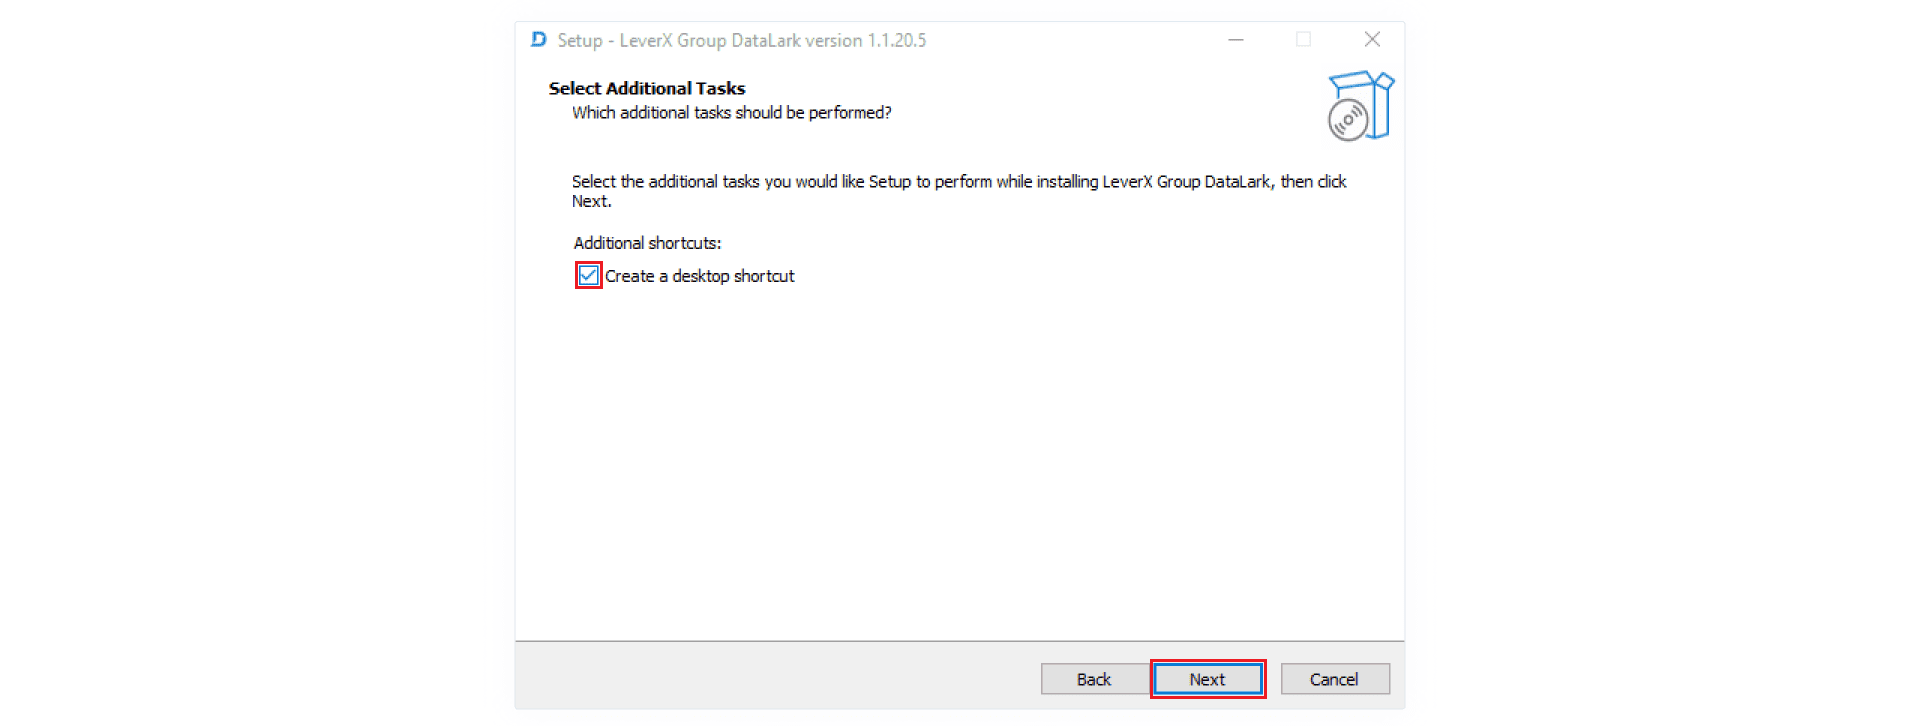 Figure 4:
Additional Tasks
Figure 4:
Additional Tasks
5. Check if the information is correct and select Install.
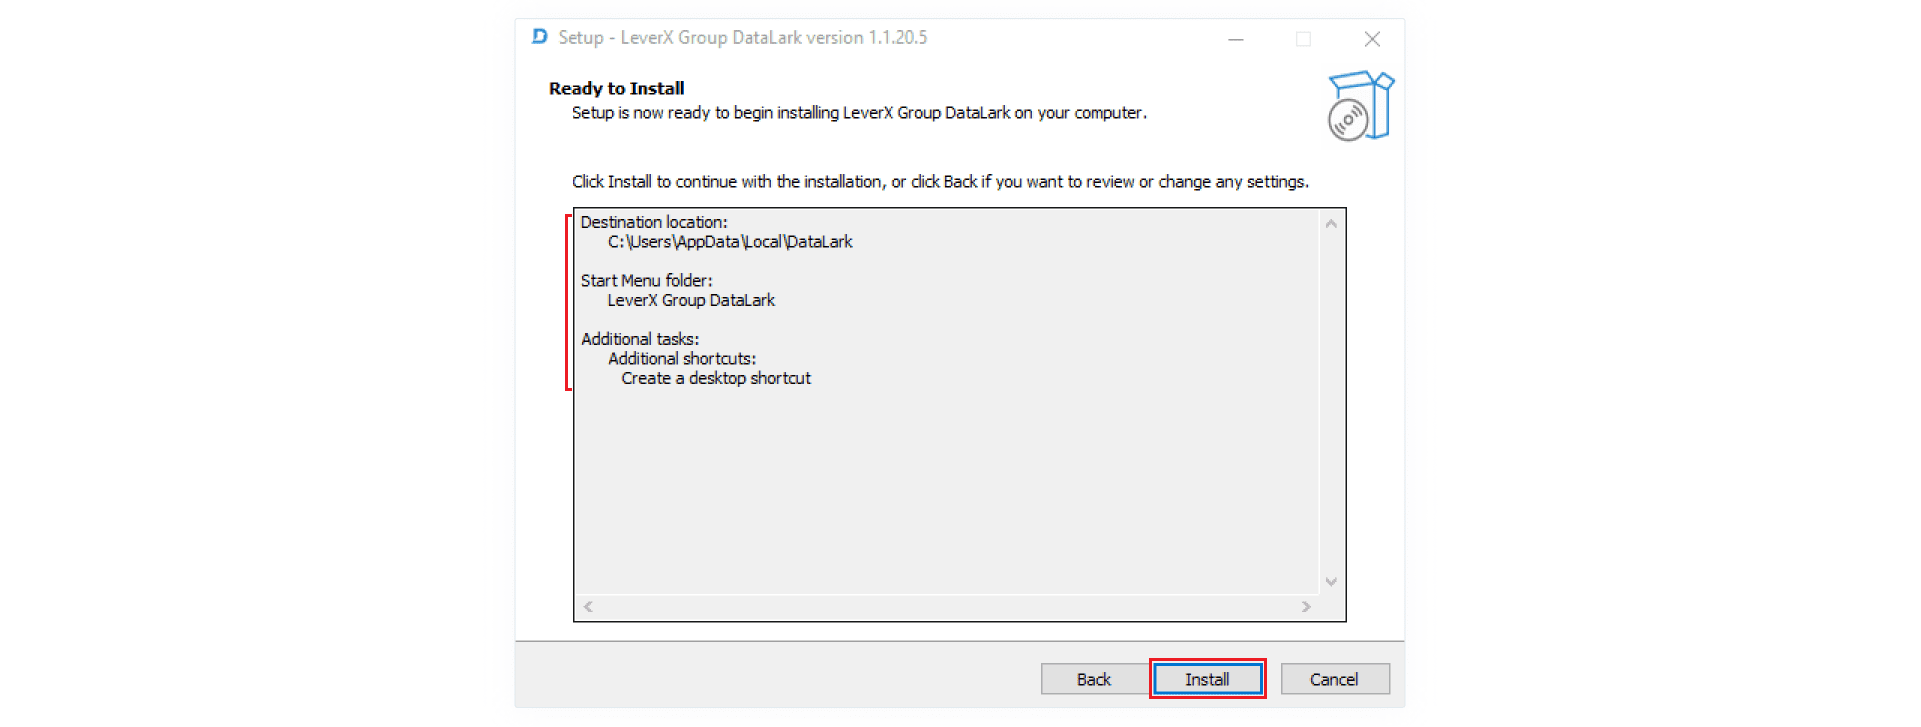 Figure 5: Ready to
Install
Figure 5: Ready to
Install
6. The installation of DataLark will start.
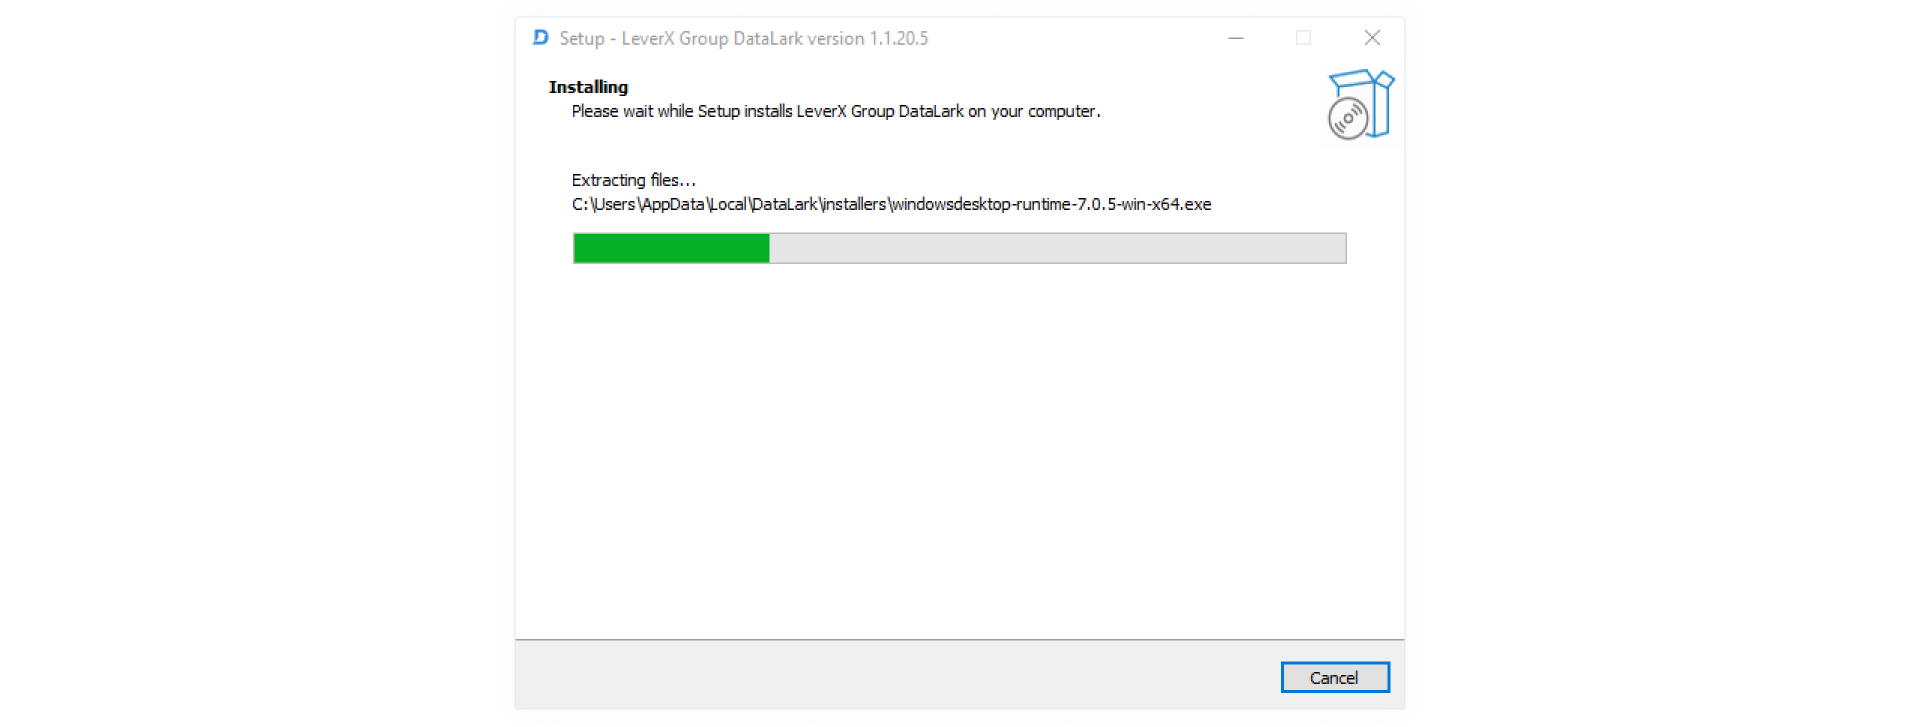 Figure 6:
Installing
Figure 6:
Installing
7. Select the components to be installed with LeverX Group DataLark and select Finish.
 Figure 7:
Completing Installation
Figure 7:
Completing Installation
8. Wait until the installation of the selected components is completed and start the application manually.
Installation Guide
Version 1.1.30.7 (Sep 19, 2023)
This document guides you through the process of installing DataLark.
Overview
With the DataLark Multi-User installation, multiple users can work concurrently on a single computer or virtual machine, gaining access to shared projects and connections. Note that administrator rights are required to install DataLark. Once installed, the application is available for all users.
The storage of the projects has changed, so you now need to export all your projects and then re-import them after updating to the new version.
The installation process involves 10 steps. During those 10 steps, the components listed below will be installed:
- DataLark Core Application
- ArangoDB v.3
- Microsoft Visual C++ 2013 Redistributable x64
- Microsoft Visual C++ 2019/2022 Redistributable x64
- Run DataLark Service
- .NET Libraries
- .NET Core Hosting Bundle 7.0.11 win x64
- .NET Desktop Runtime 7.0.11 win x64
- Run DataLark Service
Requirements
Before you begin, make sure your device meets the DataLark system requirements:
Note that larger projects require more system resources, for example, a data set with 10k records increases the size of the local database by about 1GB per run.
To install on virtual machines, follow the requirements below.
Operating System Requirements
DataLark can be installed only on a Windows-based operating system. The recommended version is Windows Server 2019 or 2022.
All supported versions:
- Windows 11 version 21H2 or higher: Home, Pro, Pro
Education, Pro for Workstations,
Enterprise, and Education
- Windows 10 version 1909 or higher: Home, Professional, Education, and Enterprise
- Windows Server 2022: Standard and Datacenter
- Windows Server 2019: Standard and Datacenter
- Windows Server 2016: Standard and Datacenter
Minimum Hardware Requirements
DataLark DEV Instance:
- 4 vCPU
- 64GB RAM
- 2GB SSD Drive for DataLark core components and DataLark Database
DataLark QA and PROD Instance:
- 4 vCPU
- 64GB RAM
- 4GB SSD Drive for DataLark core components and DataLark Database
DataLark Download
1. Download DataLark Multi-User.
2. Wait until the download is complete and run the installer.
DataLark Installation
1. After launching the installer, you will be prompted to accept the License Agreement.
-png.png) Figure 1: License
Agreement
Figure 1: License
Agreement
2. Select Next to install the application in the default location or select Browse… to choose a different location.
-png.png) Figure 2:
Destination Location
Figure 2:
Destination Location
Consider the disk space required by the application.
3. Select Next.
-png.png) Figure 3: Start
Menu Folder
Figure 3: Start
Menu Folder
4. Mark the Create a desktop shortcut checkbox and select Next.
-png.png) Figure 4:
Additional Tasks
Figure 4:
Additional Tasks
5. Check if the information is correct and select Install.
-png.png) Figure 5: Ready to
Install
Figure 5: Ready to
Install
6. The installation of DataLark Multi-User will start.
-png.png) Figure 6:
Installing
Figure 6:
Installing
7. Select the components to be installed with DataLark Multi-User and choose Finish.
-png.png) Figure 7:
Completing Installation
Figure 7:
Completing Installation
8. Wait for the installation of the selected components to complete.
9. Copy and paste your license.dat file in any of the following:
- DataLarlk Installation Directory, Client folder
- User's Desktop or Documents
- C:\Users\<User>\Desktop
- C:\Users\<User>\Documents
- C:\Users\Public\<User>\AppData\Local
- C:\Users\Public\Documents
10. Start the application manually.
Installation Guide
Version 1.1.32.8 (Nov 2, 2023)
This document guides you through the process of installing DataLark.
Overview
You can install DataLark in both single-user and multi-user configurations. Note that administrator rights are required to install the application.
With the multi-user installation, multiple users can work concurrently on a single computer or virtual machine, gaining access to shared projects and connections. Once installed by the administrator, the application is available for all users.
Note that the project storage has changed, so you now need to export all your projects and then re-import them after updating to the new version.
The installation process involves 9 steps. During those steps, the components listed below will be installed:
- DataLark Core Application
- ArangoDB v.3
- Microsoft Visual C++ 2013 Redistributable x64
- Microsoft Visual C++ 2019/2022 Redistributable x64
- Run DataLark Service
- .NET Libraries
- .NET Core Hosting Bundle 7.0.13 win x64
- .NET Desktop Runtime 7.0.13 win x64
- Run DataLark Service
Requirements
Before you begin, make sure your device meets the DataLark system requirements:
Note that larger projects require more system resources, for example, a data set with 10k records increases the size of the local database by about 1GB per run.
To install DataLark on virtual machines, follow the requirements below.
Operating System Requirements
DataLark can be installed only on a Windows-based operating system. The recommended version is Windows Server 2019 or 2022.
All supported versions:
- Windows 11 version 21H2 or higher: Home, Pro, Pro
Education, Pro for Workstations,
Enterprise, and Education
- Windows 10 version 1909 or higher: Home, Professional, Education, and Enterprise
- Windows Server 2022: Standard and Datacenter
- Windows Server 2019: Standard and Datacenter
- Windows Server 2016: Standard and Datacenter
Minimum Hardware Requirements
DataLark DEV Instance:
- 4 vCPU
- 64GB RAM
- 2GB SSD Drive for DataLark core components and DataLark Database
DataLark QA and PROD Instance:
- 4 vCPU
- 64GB RAM
- 4GB SSD Drive for DataLark core components and DataLark Database
DataLark Download
1. Download DataLark.
2. Wait until the download is complete and run the installer.
DataLark Installation
1. After launching the installer, you will be prompted to accept the License Agreement.
-png.png) Figure 1: License
Agreement
Figure 1: License
Agreement
2. Select Next to install the application in the default location or select Browse… to choose a different location.
-2.png) Figure 2:
Destination Location
Figure 2:
Destination Location
Consider the disk space required by the application.
3. Select Next.
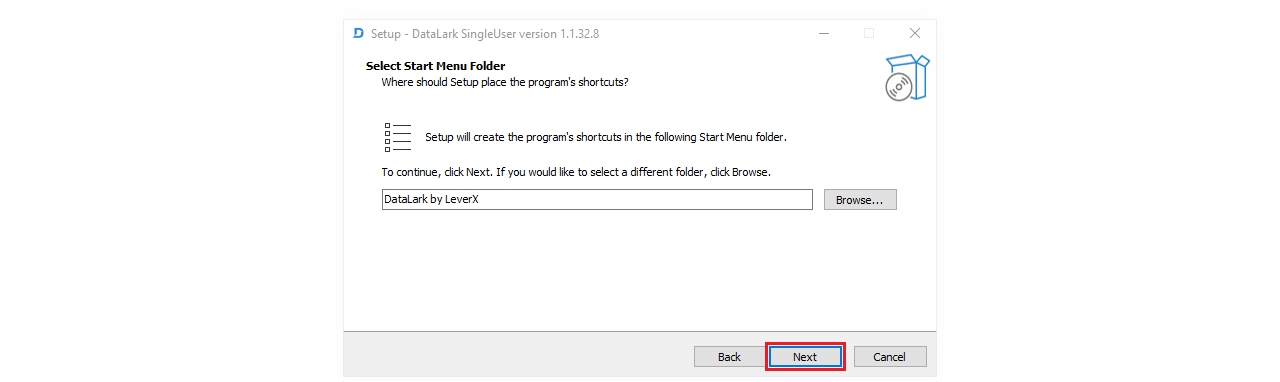 Figure 3: Start Menu Folder
4. Mark the Create a desktop shortcut checkbox and select Next.
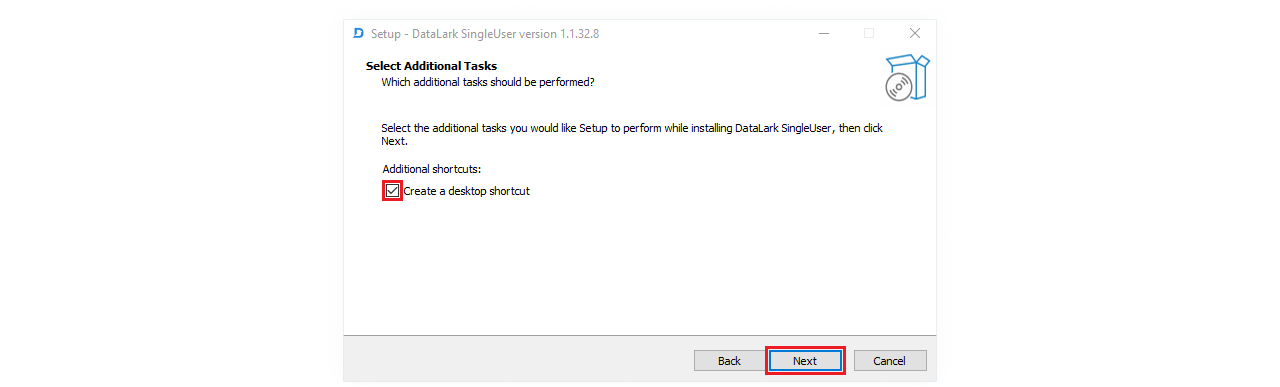 Figure 4:
Additional Tasks
Figure 4:
Additional Tasks
5. Check if the information is correct and select Install.
-2.png) Figure 5: Ready to
Install
Figure 5: Ready to
Install
6. The installation of DataLark will start.
 Figure 6:
Installing
Figure 6:
Installing
7. Select the components to be installed with DataLark and choose Finish.
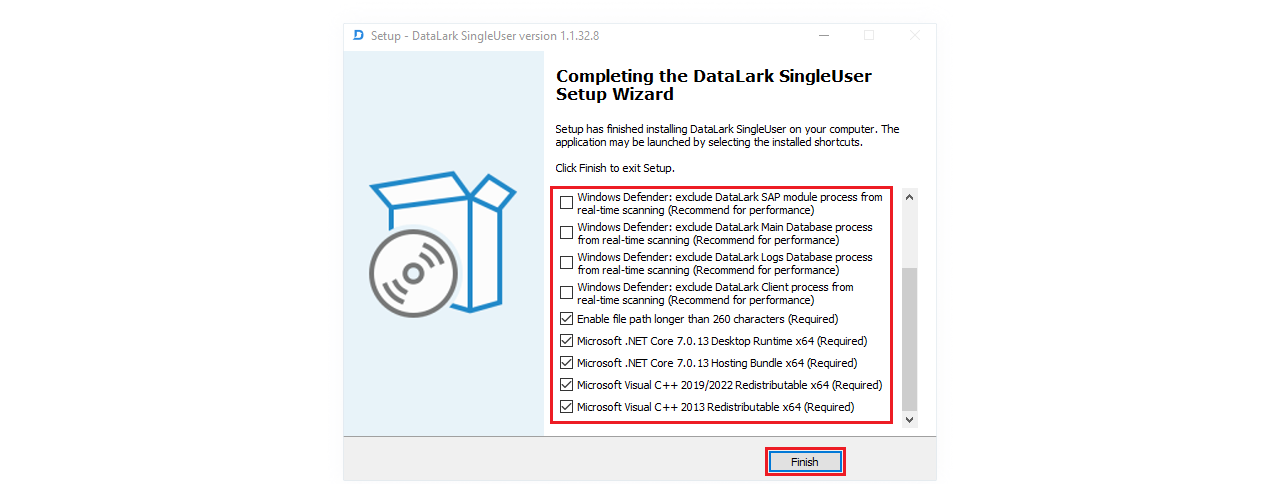 Figure 7:
Completing Installation
Figure 7:
Completing Installation
8. Wait for the installation of the selected components to complete.
9. Start the application manually. For administrator account registration and sign-in instructions, refer to Creating Administrator Account and Signing In.
Related articles
Installation Guide: Desktop Mode
Version 1.1.38.8 (Mar 1, 2024) and later
This document guides you through the process of installing DataLark.
Overview
You can install DataLark in both single-user and multi-user configurations. Note that administrator rights are required to install the application.
With the multi-user installation, multiple users can work concurrently on a single computer or virtual machine, gaining access to shared projects and connections. Once installed by the administrator, the application is available for all users.
Note that the project storage has changed, so you now need to export all your projects and then re-import them after updating to the new version.
The installation process involves 9 steps. During those steps, the components listed below will be installed:
- DataLark Core Application
- Microsoft Visual C++ 2013 Redistributable x64
- Microsoft Visual C++ 2019/2022 Redistributable x64
- .NET Libraries
- .NET 8 Core Hosting Bundle win x64
- .NET 8 Desktop Runtime win x64
- Run DataLark Service
Requirements
Before you begin, make sure your device meets the DataLark system requirements:
Note that larger projects require more system resources, for example, a data set with 10k records increases the size of the local database by about 1GB per run.
To install DataLark on virtual machines, follow the requirements below.
Operating System Requirements
DataLark can be installed only on a Windows-based operating system. The recommended version is Windows Server 2019 or 2022.
All supported versions:
- Windows 11 version 21H2 or higher
- Windows 10 version 1809 or higher
- Windows Server 2022
- Windows Server 2019
DataLark Download
1. Download DataLark.
2. Wait until the download is complete and run the installer.
DataLark Installation
1. After launching the installer, you will be prompted to accept the License Agreement.
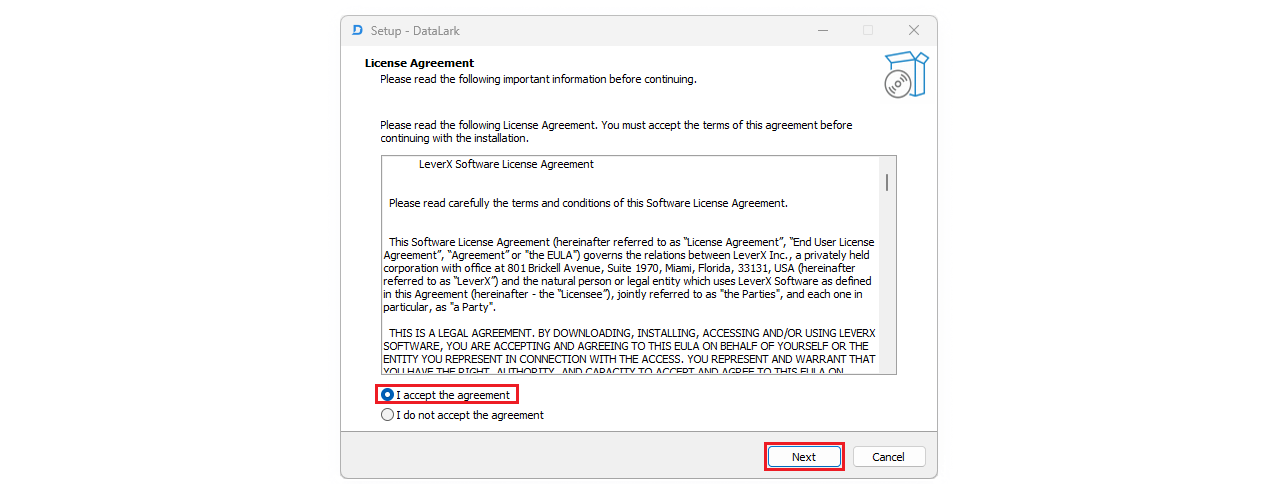 Figure 1: License
Agreement
Figure 1: License
Agreement
2. Select Next to install the application in the default location or select Browse… to choose a different location.
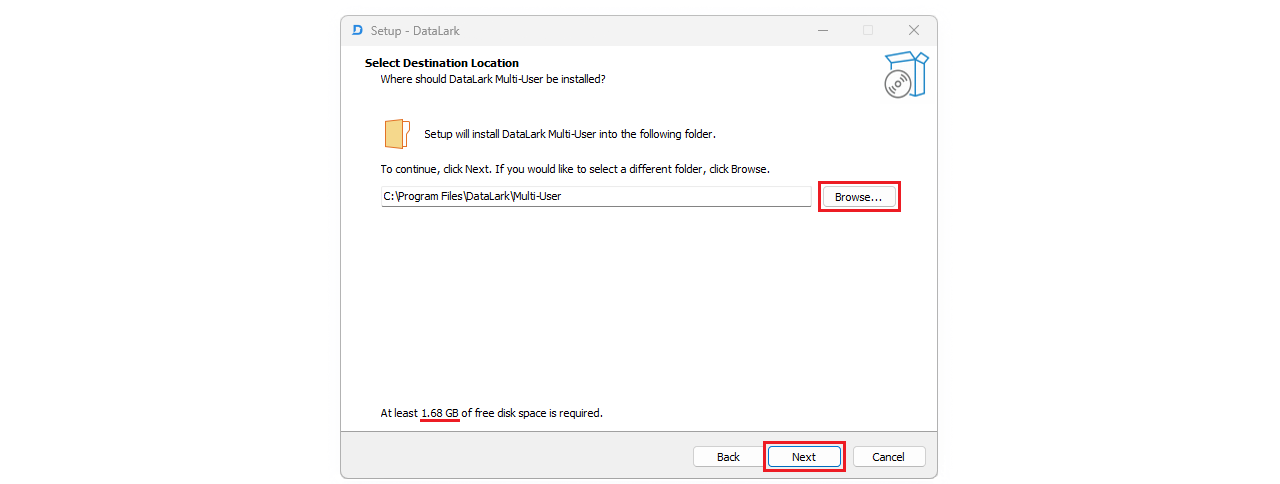 Figure 2:
Destination Location
Figure 2:
Destination Location
Consider the disk space required by the application.
3. Select Next.
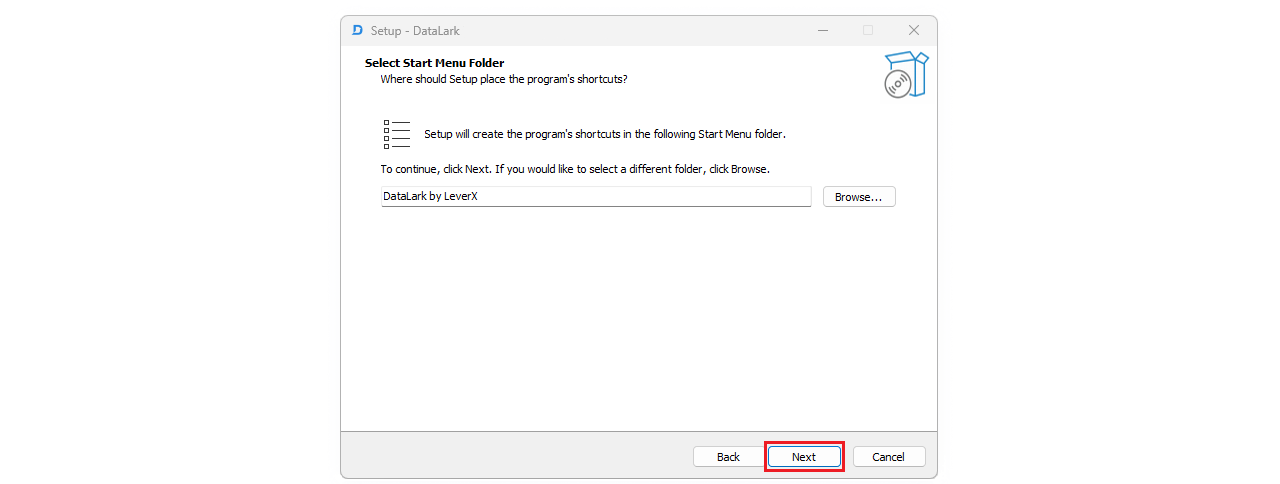 Figure 3: Start Menu Folder
4. Mark the Create a desktop shortcut checkbox and select Next.
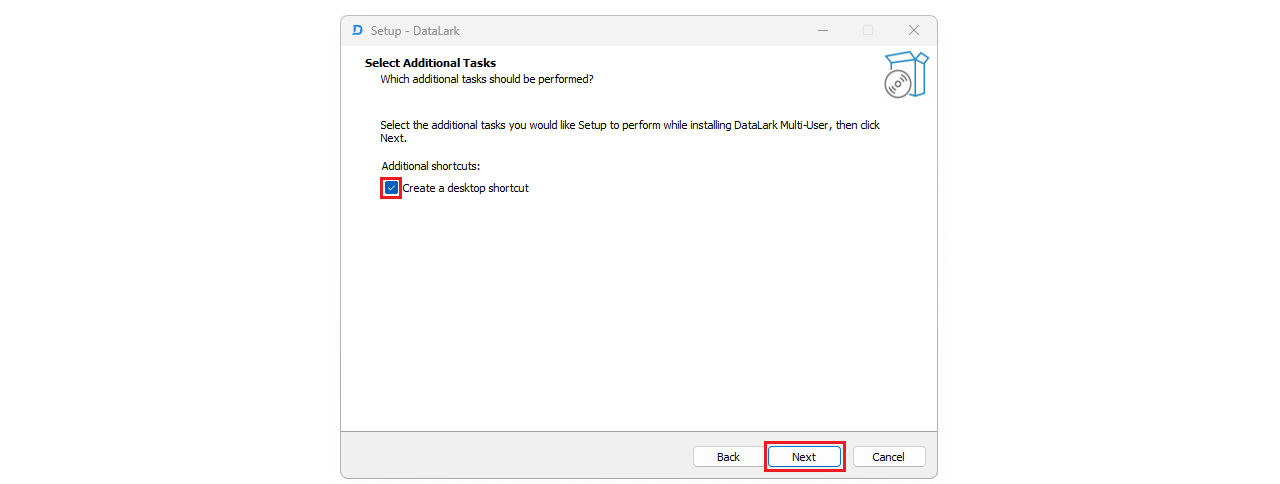 Figure 4:
Additional Tasks
Figure 4:
Additional Tasks
5. Check if the information is correct and select Install.
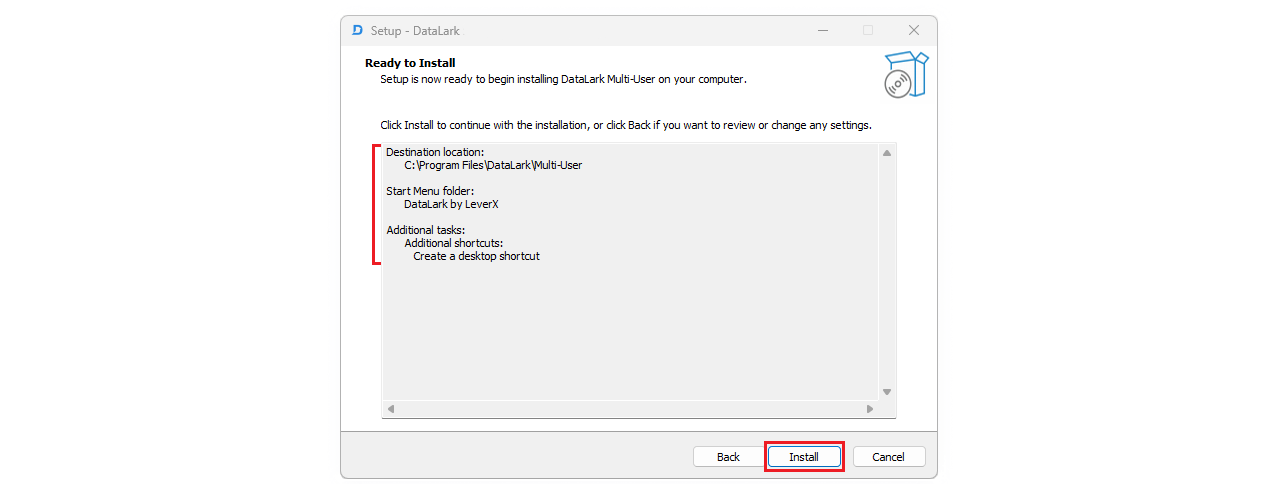 Figure 5: Ready to
Install
Figure 5: Ready to
Install
6. The installation of DataLark will start.
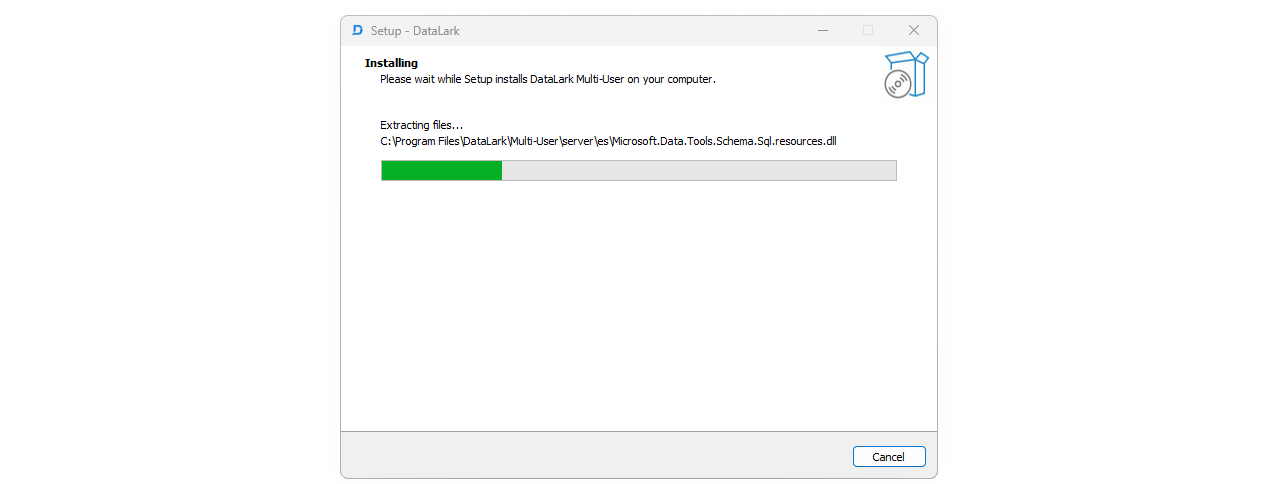 Figure 6:
Installing
Figure 6:
Installing
7. Select the components to be installed with DataLark and choose Finish.
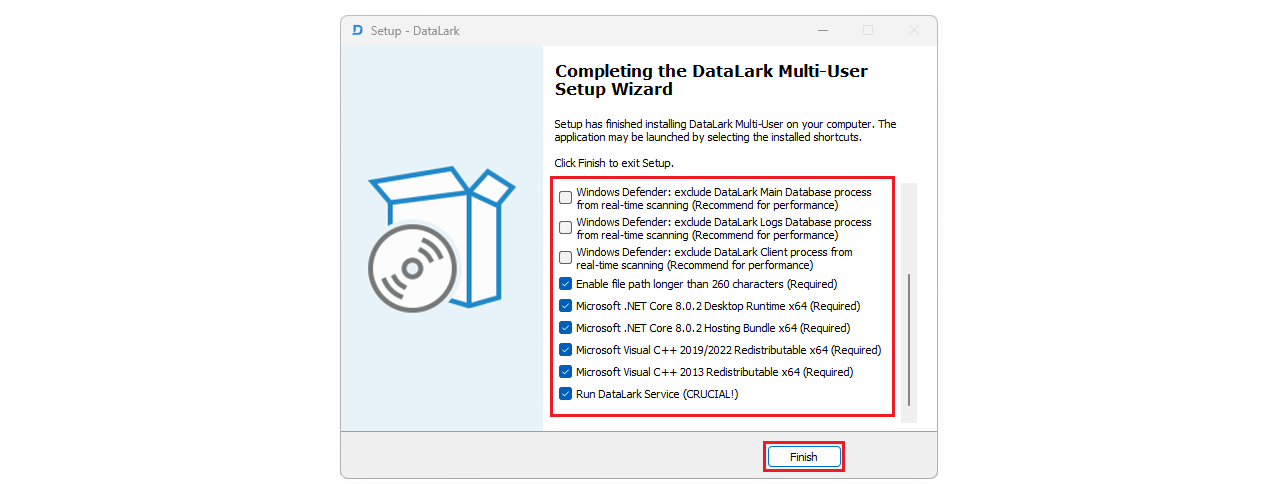 Figure 7:
Completing Installation
Figure 7:
Completing Installation
8. Wait for the installation of the selected components to complete.
9. Start the application manually. For administrator account registration and sign-in instructions, refer to Creating Administrator Account and Signing In.
Related articles
Installation Guide: Desktop Mode
Version 1.1.42.13 (Jun 20, 2024) and later
This document guides you through the process of installing DataLark.
Overview
You can install DataLark in both single-user and multi-user configurations. Note that administrator rights are required to install the application.
With the multi-user installation, multiple users can work concurrently on a single computer or virtual machine, gaining access to shared projects and connections. Once installed by the administrator, the application is available for all users.
Note that the project storage has changed, so you now need to export all your projects and then re-import them after updating to the new version.
The installation process involves 9 steps. During those steps, the components listed below will be installed:
- DataLark Core Application
- Microsoft Visual C++ 2013 Redistributable x64
- Microsoft Visual C++ 2019/2022 Redistributable x64
- .NET Libraries
- .NET 8 Core Hosting Bundle win x64
- .NET 8 Desktop Runtime win x64
- Run DataLark Service
DataLark Download
1. Download DataLark.
2. Wait until the download is complete and run the installer.
DataLark Installation
1. After launching the installer, you will be prompted to accept the License Agreement.
Figure 1: License
Agreement
2. Select Next to install the application in the default location or select Browse… to choose a different location.
Figure 2: Destination
Location
Consider the disk space required by the application.
3. Select Next.
Figure 3: Start Menu Folder
4. Mark the Create a desktop shortcut checkbox and select Next.
Figure 4: Additional
Tasks
5. Check if the information is correct and select Install.
Figure 5: Ready to
Install
6. The installation of DataLark will start.
Figure 6: Installing
7. Select the components to be installed with DataLark and choose Finish.
Figure 7: Completing
Installation
Choosing to bypass Windows Defender during installation can improve app performance, but it may trigger security alerts depending on your company's policies.
8. Wait for the installation of the selected components to complete.
9. Start the application manually. For administrator account registration and sign-in instructions, refer to Creating Administrator Account and Signing In.
For more detailed information on system requirements and DataLark components, please refer to the Deployment Matrix. Please note that a sign-in is required to get full access to the user documentation.